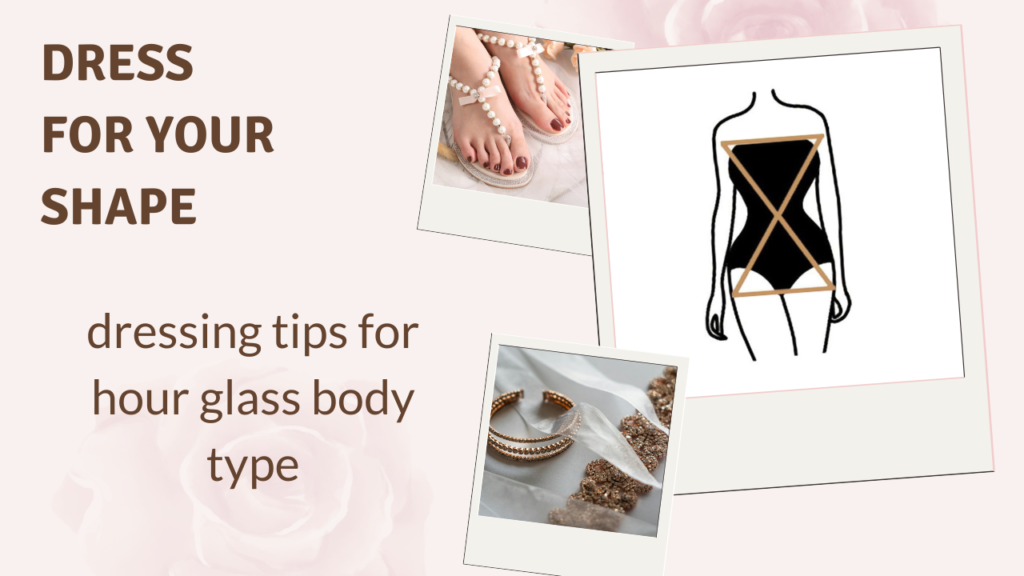
How to Dress Up According to the Color Wheel
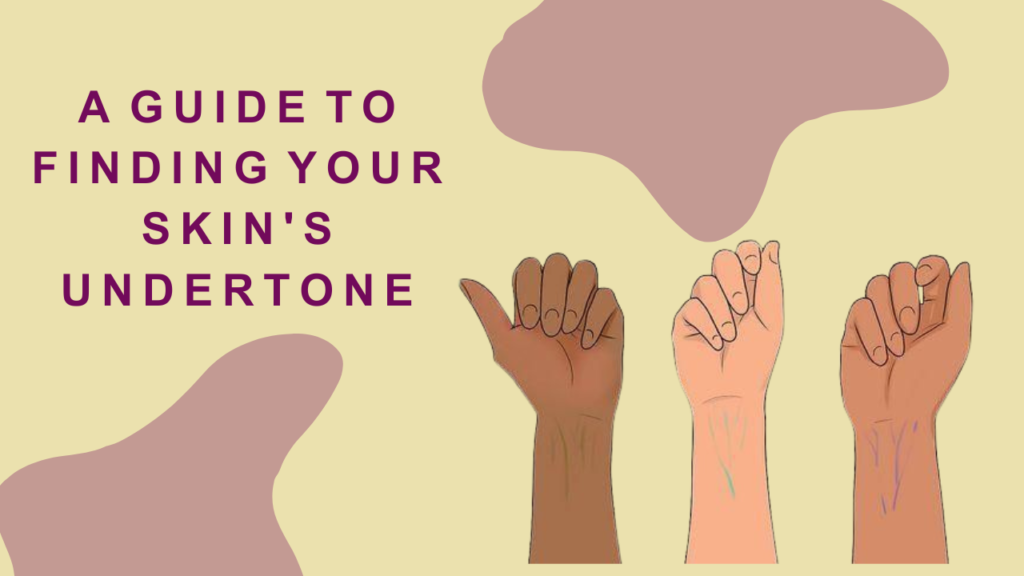
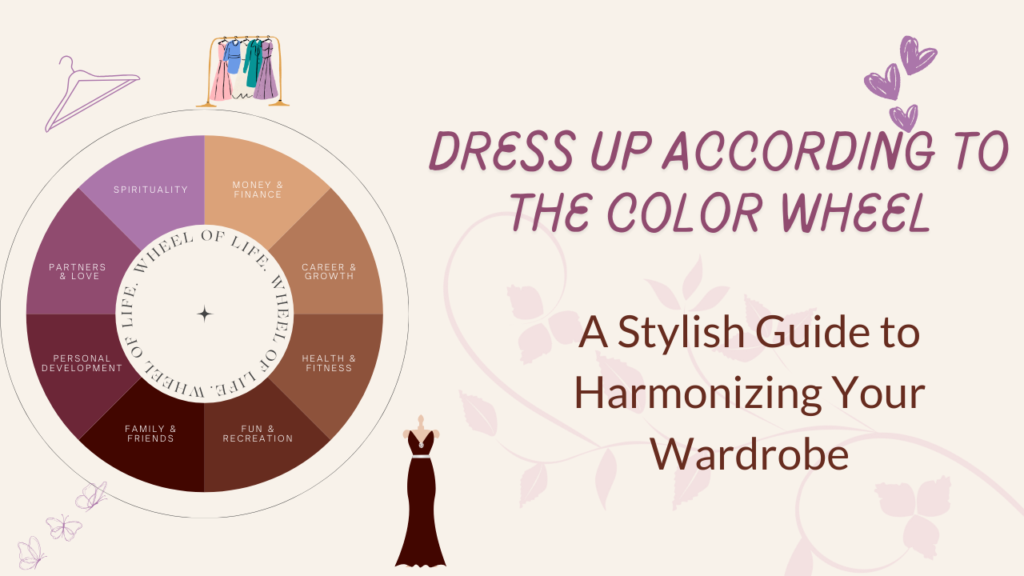
How to Dress Up According to the Color Wheel: A Stylish Guide to Harmonizing Your Wardrobe Dressing according to the color wheel is a simple yet powerful way to elevate your style. By understanding how colors interact, you can create outfits that are visually appealing, balanced, and complementary to your skin tone. The color wheel helps you understand which colors work well together and how to create cohesive, flattering looks for any occasion. In this guide, we’ll show you how to use the color wheel to dress in a way that enhances your natural features, boosts your confidence, and makes you stand out in a good way! What is the Color Wheel? The color wheel is a circular diagram that shows the relationships between colors. It’s divided into: Primary Colors: Red, Blue, Yellow. Secondary Colors: Orange, Green, Purple (created by mixing two primary colors). Tertiary Colors: Combinations of primary and secondary colors, like red-orange, blue-green, etc. Understanding how to use the color wheel effectively can help you make sense of color theory and choose color combinations that are visually balanced and complementary. 1. Complementary Colors: Bold and Eye-Catching Combinations Complementary colors are located directly across from each other on the color wheel. When paired together, they create contrast and make each other appear more vibrant. This color combination is perfect for making a bold statement. Examples of Complementary Color Pairs: Red & Green Blue & Orange Yellow & Purple How to Dress in Complementary Colors: Red & Green: Try a bright red dress with green accessories (a green bag or shoes) for a lively, festive look. This is great for Christmas-themed parties or any occasion where you want to stand out. Blue & Orange: A royal blue dress paired with orange accessories (like a belt or shoes) creates a striking, energetic look. This combination works well for casual outings or summer parties. Yellow & Purple: A yellow dress with purple accessories (like a purple scarf or shoes) gives off a fun, vibrant vibe. This works well for evening events or a fashion-forward statement. Best for: Events where you want to stand out and create visual interest, such as parties, festivals, or casual get-togethers. 2. Analogous Colors: Harmonious and Subtle Pairings Analogous colors are next to each other on the color wheel and create a harmonious, visually pleasing look. These combinations are softer and more relaxed, making them great for day-to-day wear or more professional settings. Examples of Analogous Color Combinations: Red, Red-Orange, Orange Blue, Blue-Green, Green Yellow, Yellow-Green, Green How to Dress in Analogous Colors: Red, Red-Orange, and Orange: A coral dress with red accessories creates a warm, vibrant look without clashing. This combination is perfect for a brunch or a relaxed, daytime event. Blue, Blue-Green, and Green: A teal dress with green jewelry or a blue-green top with navy pants creates a cool, calming look. This combination works great for professional settings or casual outings. Yellow, Yellow-Green, and Green: A soft yellow dress with green accessories or a yellow-green blouse with olive pants creates a fresh, natural vibe. This is ideal for spring or garden parties. Best for: Casual outings, professional wear, or events where you want a cohesive and elegant look. 3. Triadic Colors: Bold and Balanced Combinations Triadic colors are evenly spaced around the color wheel and form a triangle. These combinations are vibrant, but because they are balanced, they don’t overwhelm the eyes. Triadic color schemes are perfect when you want to stand out without being too dramatic. Examples of Triadic Color Combinations: Red, Yellow, Blue Purple, Orange, Green How to Dress in Triadic Colors: Red, Yellow, and Blue: A yellow dress with red and blue accessories (like a red belt and blue shoes) creates a bold, colorful look. This combination is ideal for a fun, lively event where you want to express creativity. Purple, Orange, and Green: A purple top paired with orange pants and green accessories creates a bold, energetic vibe. This look is perfect for art-related events, creative work environments, or a fashion-forward gathering. Best for: Creative events, parties, or any occasion where you want to show off your vibrant personality. 4. Monochromatic Colors: Sleek and Elegant Monochromatic color schemes involve using different shades, tints, or tones of a single color. This results in a sophisticated, sleek look with subtle variations in hue. It’s an elegant approach that doesn’t require too much thought but still delivers a stylish impact. Examples of Monochromatic Color Schemes: Light Blue, Blue, Navy Blue Pink, Light Pink, Burgundy How to Dress in Monochromatic Colors: Light Blue, Blue, and Navy Blue: A navy blue dress with a light blue scarf or jacket creates a sleek, monochromatic look. This works well for formal events or professional settings. Pink, Light Pink, and Burgundy: A soft pink blouse with burgundy pants and a light pink handbag makes for an elegant and cohesive outfit that’s perfect for daytime wear or a date. Best for: Office wear, formal events, or anytime you want a refined and polished look. 5. Split-Complementary Colors: Balanced but Vibrant Split-complementary colors are a variation of complementary colors, where you use the two colors adjacent to the complementary color. This results in a high-contrast look without being too overpowering. Examples of Split-Complementary Pairs: Blue, Yellow-Orange, Red-Orange Green, Red-Purple, Blue-Purple How to Dress in Split-Complementary Colors: Blue, Yellow-Orange, and Red-Orange: A blue dress with yellow-orange accessories and red-orange shoes creates a playful and balanced look. This combination is perfect for evening parties or any social gathering where you want to make a statement. Green, Red-Purple, and Blue-Purple: A green dress with red-purple earrings and a blue-purple handbag creates an unexpected yet stylish color combo. This look is ideal for events where you want to show off a unique sense of style. Best for: Evening events, social gatherings, or anytime you want to make an impression with a balanced yet bold look. Tips for Dressing According to the Color Wheel: Know Your Skin Tone: Understanding whether you have a warm,