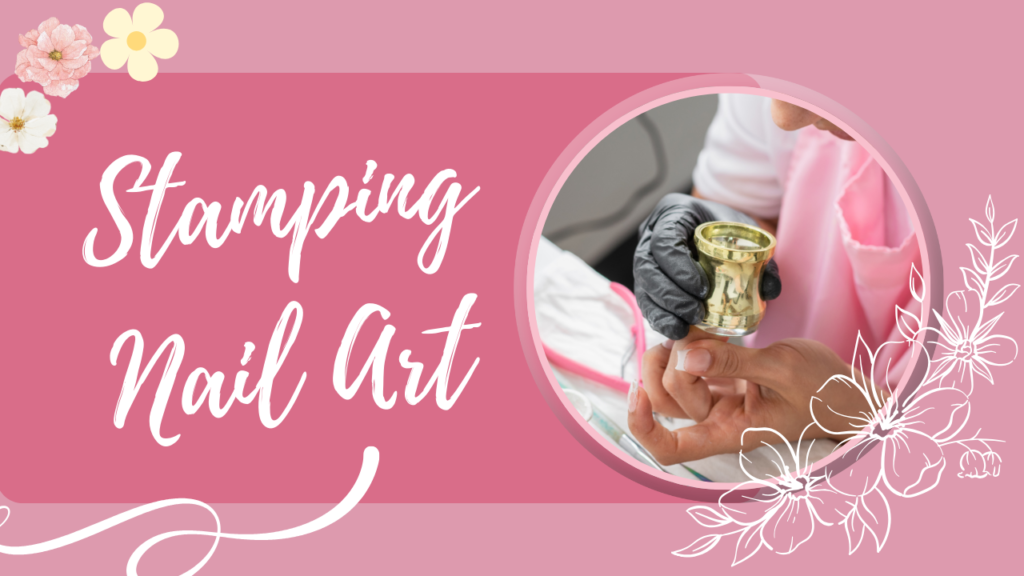
Mehasa

nails

elegance, nails

Stamping Nail Art: A Quick and Impressive Technique

Stamping nail art is a popular and easy-to-learn technique that allows you to create intricate and detailed designs on your nails with precision. It is one of the most time-efficient ways to achieve professional-looking nail art at home, and it’s ideal for both beginners and advanced nail artists. What is Stamping Nail Art? Stamping nail art involves using special plates that have designs etched into them, a scraper to remove excess polish, and a stamper to transfer the design onto the nail. The stamper is a rubber or silicone tool that picks up the design from the stamping plate and then transfers it onto your nails. This technique allows for consistent and detailed patterns without needing a steady hand for freehand painting. Tools Needed for Stamping Nail Art To get started with stamping nail art, you will need the following tools: Stamping Plates: These are metal plates with various patterns and designs etched into them. Some plates feature floral patterns, geometric designs, and more. You can find plates with specific themes like holidays or nature. Stamping Polish: Special nail polishes are used for stamping. They are usually thicker and more opaque than regular polishes, which helps them transfer more clearly onto the nail. You can use different colors for a multi-colored design. Scraper: The scraper is used to remove the excess polish from the stamping plate after you apply it. It is typically made from plastic or metal. Stamper: This is a rubber or silicone tool that picks up the design from the stamping plate and transfers it onto your nails. Stamper heads come in different sizes, and some are clear for better visibility. Top Coat: A clear top coat is used to seal the design and give your nails a shiny finish. It also helps the design last longer. How to Do Stamping Nail Art: A Step-by-Step Guide Prep Your Nails: Start by cleaning and trimming your nails. Apply a base coat to protect your nails and provide a smooth surface for the stamping. Apply the Stamping Polish: Choose a stamping polish and apply a generous amount over the design on the stamping plate. Scrape the Excess Polish: Use the scraper to remove any excess polish from the plate, leaving the design in the etched lines. Make sure you scrape in a straight motion to ensure the design is clean and sharp. Pick Up the Design with the Stamper: Quickly roll the stamper over the design on the plate to pick it up. Be sure to do this swiftly, as the stamping polish can dry fast. Stamp the Design onto Your Nail: Gently press the stamper onto your nail and roll it slightly to transfer the design evenly. You can position the design however you like on the nail. Seal with Top Coat: Once you are happy with the design, apply a top coat to protect the nail art and give it a glossy finish. Make sure to apply it gently to avoid smudging the design. Why Choose Stamping Nail Art? Quick and Easy: Stamping is one of the quickest nail art methods. It’s a great choice for people who want beautiful designs in a short amount of time. Precision and Detail: Stamping allows you to get intricate, professional-level designs without needing a steady hand or advanced painting skills. Versatility: There are a wide variety of stamping plates with numerous patterns, so you can create endless designs—from simple patterns to complex motifs. Cost-Effective: Stamping plates are relatively affordable and can be used repeatedly, making it a cost-effective option for creating salon-quality designs at home. Types of Stamping Nail Art Designs Floral Patterns: Floral designs are some of the most popular choices for stamping. You can create soft, delicate flower patterns or bold, colorful blooms. Geometric Shapes: If you love clean, sharp lines, geometric patterns like stripes, chevrons, or triangles work beautifully with stamping. Holiday and Themed Designs: Stamping plates often have designs for specific holidays like Christmas, Halloween, or Valentine’s Day. You can also find plates with seasonal designs like snowflakes or autumn leaves. Minimalist Designs: Simple patterns, dots, or lines can also be created with stamping for a minimalist, chic look. Advantages of Stamping Nail Art Consistency: Stamping allows you to replicate the same design on each nail, ensuring that the art looks consistent and clean. Time-Saving: Compared to freehand painting, stamping takes less time, making it ideal for those who want quick but intricate designs. Ease of Use: Even beginners can master the stamping technique with a little practice, making it a great choice for those new to nail art. Challenges of Stamping Nail Art Stamping Plate and Polish Quality: Not all stamping plates and polishes work equally well. Some plates may not have deep enough etching to transfer the design clearly, and some polishes may not pick up as easily. Transfer Issues: Sometimes, the design may not transfer perfectly, leaving part of the image behind or causing smudging. It may take a few attempts to get it right. Requires Practice: While stamping is easier than freehand art, it still requires practice to perfect your technique, especially in picking up the design correctly and transferring it smoothly onto your nails. Conclusion Stamping nail art is an excellent choice for anyone who wants to create detailed and intricate designs without needing to master freehand painting. With the right tools and a little practice, you can achieve salon-quality nail art in the comfort of your home. Whether you’re looking for bold geometric patterns, delicate floral designs, or seasonal motifs, stamping offers endless possibilities to express your creativity.

elegance, nails, STYLE GUIDE

Freehand Nail Art: A Creative and Personal Approach to Nail Design

Freehand nail art is one of the most artistic and versatile methods of creating unique and intricate designs on your nails. Unlike other nail art techniques that require stencils, stamps, or tools like water marbling, freehand nail art allows the artist to use their creativity to paint directly on the nails, producing truly personalized results. What is Freehand Nail Art? Freehand nail art is the process of drawing or painting designs directly onto the nails without any external tools or templates. It involves using brushes, nail pens, and sometimes dotting tools to create a wide range of designs—from simple patterns to elaborate works of art. The freedom this technique offers means that almost any design is possible, allowing nail enthusiasts to create exactly what they envision. Tools Needed for Freehand Nail Art To get started with freehand nail art, you don’t need a long list of complicated tools. Here are the basic tools you will need: Fine-Tipped Brushes: These are essential for creating delicate lines, intricate details, and small designs. Nail Art Pens: Special pens for nail art can help you create fine lines and easy designs. Dotting Tools: Used to create dots, lines, or to enhance a design with a touch of creativity. Nail Polish: You’ll need various colors for your designs. Both regular and gel polish work for freehand designs.   Top Coat: To seal your design and give it a smooth, glossy finish. Techniques for Freehand Nail Art Simple Designs: Starting with basic shapes like stripes, dots, or checks is a great way to practice. For example, you can create diagonal stripes or a polka dot pattern with   a dotting tool. Floral and Nature Designs: Flowers, leaves, and vines are popular designs for freehand nail art. These are usually created using a fine-tipped brush or nail pens to paint each petal or leaf delicately. Geometric and Abstract Designs: Freehand is perfect for creating geometric patterns like triangles, squares, or chevron patterns. Abstract designs can also be drawn, where the focus is on shapes, lines, and colors without following a specific form. Character Art: If you’re feeling more adventurous, freehand nail art allows you to paint small illustrations or characters. You can create cute animals, cartoon characters, or even mini landscapes on your nails.   Why Choose Freehand Nail Art? Endless Creativity: Freehand nail art lets you explore unlimited creativity, as it is not confined to pre-designed patterns or stencils. You can mix colors, styles, and techniques to make something unique every time.   Personalization: You can create custom designs that reflect your personality, moods, or even celebrate holidays and special occasions like birthdays and weddings. No Special Equipment: Unlike other methods that require tools like stamping plates or foil, freehand nail art only requires a steady hand and the right brushes. Challenges of Freehand Nail Art While freehand nail art offers unmatched creativity, it does come with its challenges: Skill and Practice: Freehand designs require practice to perfect. It may take a few tries to get the lines straight or to create the right shapes. Time-Consuming: Depending on the complexity of the design, freehand nail art can take longer compared to other methods like stamping or using stickers. Conclusion Freehand nail art is an exciting and creative way to express yourself through your nails. Whether you’re creating simple designs or intricate patterns, the possibilities are endless. With practice, patience, and the right tools, anyone can master freehand nail art and showcase their unique designs with pride. So, grab your brushes and start creating your own stunning nail art today!

elegance, nails

Nails shape

Nail Shapes: A Complete Guide to Choosing the Perfect Style Nail shapes are an important way of expressing personality and style. Whether you want a subtle, natural look or a bold and dramatic effect, the shape of your nails can change the look of your hands and tell the world who you are. In this article, we will explore the different nail shapes, their characteristics, and how to choose the perfect one for your style and lifestyle. At the end of this, you will have a complete understanding of nail shapes and factors to consider when deciding on the ideal shape for your hands. 1. Understanding Nail Anatomy The first thing necessary to understand about nail forms is the basic anatomy. Nails have several key parts, which include Nail Plate: this is the visible part of the nail. Nail Bed: this is the underside of the nail plate under the skin. Cuticle: this is the protective skin which is at the base. Free Edge: this can be described as the piece of the nail that actually extends beyond the fingertip. Lunula: A crescent-shaped white piece at the base of the nail. Understanding these details makes a difference because each matters in how different shapes will file and hold up differently. 2. Famous Shapes of Nails So many shapes to choose from all offer unique aesthetics along with practical advantages. So here are the most common popular nail shapes: a. Boxed Nails Definition: Edges are flat as well as squared. Hard corners give a boxlike appearance. Who Would Work Well For: Suitable for people with sturdy nails, which do not bend when they try to maintain their shape. For very wide nail beds because straight sides enhance the look of width Pros: Square cuticle-friendly and hassle-free Chip-resistant hence very useful for everyday wear Cons Makes shorter fingers appear chubby Styling tips Wear them in modern bold colors or interesting designs. b. Round Nails Features: Silhouette: Shapely yet subtle. The shape of the curve is round with a softened tip. Overall appearance: Soft, and understated. Who Is It Suitable For: Anyone looking for a traditional and classy appearance. Ideal for shorter nails or more conservative styles Benefits: Very low maintenance. Less prone to breaking. Glamorises all fingers, especially short fingers. Downsides: Limited drama in terms of design Styling Tip: Combine round nails with neutral tones and simple designs to achieve timelessness. c. Oval Nails Features: Tapered sides with softly rounded tip. Elongated and elegant silhouette. Who It’s For: Ideal for narrow nail beds. Perfect for those who want to lengthen the look of the fingers. Advantages: Versatile and suitable for many styles. Adds feminine and sophisticated feel. Disadvantages: Needs maintenance often to keep it in the shape. Styling Tips: Pastel colors or simple floral designs will help to achieve the feminine look of an oval nail. . Almond Nails Characteristics: Nacile sides that narrow into an oval-shaped pointed tip Elegant appearance Who it suits: Can be used for the perception of longer slimmer finger Recommended with medium-long nail length. Pros; Trendy and Sophisticated. Nails can have good intricate arts and adhesions as well. Cons; The broken tip can occur easily therefore demanding proper care Styling Tips Play with some great ombre effects. Add rhinestones to create elegant almond-shaped nails. e. Coffin/Ballerina Nails Characteristics: Sides are tapered with flat, squared-off tip. Resemble a coffin or ballerina slipper Who It’s For: Best suited to those having long, strong nails or acrylic extensions Those who are trendsetters and fashion fanatics. Pros: Makes a tremendous style statement by appearing bold and dramatic. It has many spaces for elaborate nail art. Cons: Highly maintenance sensitive to breaking. How to Style It: Use bright colors, geometric patterns, or glitter to create contrast with this edgy shape. g. Stiletto Nails Characteristics Sharp, tapering tip. Dramatic, eye-catching. Who It’s For: Great for fashionistas seeking a statement look. Pair well with acrylic or gel extensions for added durability. Pros: Uniquely attention-grabbing. Fantastic canvas for creative nail art. Cons: Breaks easily and not very practical for everyday wear. Styling Tips: Pair metallics, chrome finishes, or 3D nail art with stiletto nails to really bring out the drama of this style. . Squoval Nails Characteristics: A hybrid of square and oval shapes. Edges are straight, but the tip is slightly rounded. Who It’s For: Perfect for those who require the functionality of square nails with the gentleness of oval nails. Flatters all types of nail length and finger type. Benefits: Strong and versatile. Great to maintain yet polished. Drawbacks: It may not have a drama that other shapes have. Styling Tips: Pair squoval nails with the classic French manicures or gradient designs for a sophisticated look. h. Flare Nails Characteristics: Extremely flared-out tips that resemble a fan. Very bold and unconventional. Who It’s For: For those who want to make a statement. Creative and artistic personalities. Advantages: Eye-catching and unique. Large surface area for intricate designs. Disadvantages: Not very practical for everyday tasks. Not good for weak or brittle nails. Styling Tips: Vibrant colors, textured finishes, and intricate patterns are the way to go for flare nails. i. Lipstick Nails Characteristics: Asymmetrical slanted tip resembling a lipstick bullet. Modern and edgy design. Who It’s For: Great for those who want to try something different and on-trend. Good for acrylic or gel extensions. Benefits: The unique and creative shape. Really stands out in a crowd. Drawbacks: It requires exact filing and maintenance. Style Tips: Diagonal patterns or contrasting colors can make the unique shape stand out. 3. Factors to Consider When Choosing a Nail Shape a. Finger Shape and Length The shape and length of your finger can determine which type of nail shape will look great. For example, Your short fingers make elongated shapes like almond or oval look good. For people whose fingers are wide, squoval or round shapes tend to create a balanced appearance. b. Nail Bed Width The width of your nail bed determines how specific shapes appear. Narrowly

elegance, nails

how to grow nails in 5 days

How to Grow Nails in 5 Days: Tips for Healthier, Stronger Nails Nails are a big part of personal grooming, but they can also be indicative of the general health of a person. If you are searching for methods to grow your nails faster, then it is very important to note that genetics also influence nail growth, yet there are several things that you can do to enhance quicker and healthier nail growth. Here is a step-by-step guide with evidence-based, practical tips to grow your nails in just five days. Understanding Nail Growth Before diving into actionable tips, let’s understand how nails grow. Fingernails grow from the matrix, a part of the nail root located under the cuticle. On average, fingernails grow about 3.5 millimeters per month, but factors like age, health, diet, and lifestyle can influence the rate. Although it’s not easy to expect notable growth within five days, a proper plan ensures maximum growth, and overall health of nails improves quickly. Apply Hand Cream Hydrated hands equal healthier nails. Use a moisturiz1. Proper Nutrition: The Basis of Nail Growth Good nails begin from within. Adequate nutrition for your body will see your nails grow to perfection. Focus on these key nutrients: Biotin Biotin, popularly known as Vitamin B7, is a powerhouse for nail health. It will strengthen the keratin structure, stopping breakage and promoting nail growth. Sources: Eggs, nuts, seeds, avocados, and sweet potatoes. Protein Nails are made of keratin, a type of protein. Sufficient intake of protein will support nail strength and growth. Sources: Lean meats, fish, tofu, lentils, and dairy products. Iron Iron deficiency may cause brittle or ridged nails. Ensure your diet contains iron-rich foods. Sources: Spinach, red meat, legumes, and fortified cereals. Vitamin E Vitamin E improves circulation and supports the health of your nails. Sources: Almonds, sunflower seeds, and leafy greens. Hydration Drink a lot of water to avoid dryness and brittleness. Hydrated nails are flexible and less likely to break. 2. Nail Hygiene and Maintenance Healthy nails grow faster. Keeping the environment clean and infection-free ensures your nails grow in the best possible conditions. Keep Your Nails Clean and Dry Fungal infections thrive in moist conditions, slowing down nail growth. Dry your hands well after washing and avoid staying in wet conditions for long. File and Shape Frequently Use a soft nail file to shape your nails without rough edges that may snag and break. File in one direction to avoid splitting. Avoid Harsh Chemicals Reduce exposure to harsh detergents and cleaning agents. Put on gloves when doing household chores to protect your nails. Clean Under the Nails Clean gently under your nails to prevent the accumulation of dirt and infections, but don’t overdo it because aggressive cleaning can damage the nail bed. 3. Moisturize and Nurture Apply Cuticle Oil Apply hand cream many times a day, particularly after washing your hands. DIY Nail Soaks Soak your nails in warm olive oil or milk for 10-15 minutes each day. Olive oil feeds the cuticles, while milk helps supply calcium for healthy and strong nails. 4. Circulation to the Nail Bed Blood circulation in the nail bed promotes growth. Techniques that are easy to perform are as follows: Massage Your Finger Tips Gently massage your fingers for 5-10 minutes daily. This improves circulation and delivers nutrients to the nail matrix. Exercise Regularly Physical activity increases overall blood flow, benefiting nail growth. Incorporate exercises like yoga, walking, or light cardio. 5. Protect Your Nails Avoid Nail Biting Nail biting damages the nail bed, hindering growth. Use a bitter-tasting nail polish to break the habit if necessary. Limit Use of Nail Enhancements Artificial nails, acrylics and gel manicures weaken the strength of natural nails. Let the nails breathe and recover well. Be Tender Do not use nails to open up cans or scratch surfaces. Do not break your nails into pieces and ruin them. . Supplements for Nail Growth If dietary changes don’t help, supplements are there to consider. Here are some popular options: Biotin Supplements Biotin supplements are highly available and useful for bettering the nail health. Collagen Collagen supplements stimulate the production of keratin, thus building stronger nails. Multivitamins A multivitamin every day is sure to get all the required nutrients to the nail growth. 7. Homemade Remedies for Fast Nail Growth Garlic Garlic contains selenium that can make the nails strong. Rub garlic on your nails or use garlic-infused oil on your nails. Lemon Juice Lemon juice is rich in Vitamin C, which makes your nails stronger. Soak your nails in fresh lemon juice for 5 minutes and then wash. Coconut Oil Massage warm coconut oil on your nails and cuticles before sleeping. Coconut oil hydrates and prevents breakage. Tea Tree Oil If you have brittle nails due to fungal infections, then tea tree oil can help you. Mix it with a carrier oil and apply to your nails. 8. Steer Clear of Common Nail Growth Mistakes Not Using Base Coats When applying nail polish, never forget to use a base coat to prevent staining and brittleness. Using Too Much Nail Polish Remover Acetone-based removers dry out nails. Instead, use acetone-free alternatives. Cutting Cuticles Never cut your cuticles. Instead, gently push them back to maintain nail health. Sample 5 Day Nail Care Routine Day1 Trim and file nails Soak nail in warm olive oil Apply cuticle oil and hand cream Day 2 Massage on nails and cuticles for 10 minutes DIY garlic treatment or lemon treatment Chemical was avoided on the nails due to hygiene maintenance Day 3 Repeat soaking of Olive oil on nail Push back on cuticles very lightly Serum application that enhances nail strength Day4 Massage and hydrating should continue Apply base coat for protection once nail polish is applied High protein food, commonly called Biotin Day 5 Soaking and Massage Moisturize and do not allow the water to soak much of your nails. Conclusion This would require much dedication to grow your nails within five days. However,

elegance, nails

nail polish

The Art and Science of Nail Polish: A Comprehensive Guide Nail polish, no longer just part of personal grooming and fashion across cultural and geographical lines, has added to an impressive look to the nails but turns out to be a medium of self-expression. As the history of nail polish ranges from ancient roots to modern innovations in the field of science, art, and culture, it is now quite fascinating. In this chapter, we’re going to learn about the history, makeup, types, techniques to apply it, trends in its usage, and impacts it has on nails other than knowing how to keep your nails healthy. 1. History of nail polish Ancient Origins The history of nail decoration dates back more than 5,000 years. The earliest accounts about nail coloring originate from ancient China, around 3000 BCE, where beeswax, egg whites, gelatin, and vegetable dyes were combined to color the nails. In ancient Egypt, the application of henna on the nails was widespread, and the color often indicated the social status. Nobility used red shades, and those of lower classes chose lighter tones. Middle Ages to the Modern Era It was dying in Europe during the Middle Ages because it was considered an empty practice. However, it became a booming business elsewhere, especially in Asia and the Middle East. The modern nail polish industry as we have today started to boom in the 1920s when French makeup artist Michelle Menard invented the first glossy lacquer based on automobile paint. Contemporary Developments The chip-resistant formulas, gel polish, and nail art pens were found in the 20th and 21st century. Today, nail polish is widely used all around the world with a value of billions of dollars, which tells that it is popular around the world and innovative as well. 2. The Science Behind Nail Polish Composition Modern nail polish is an extremely complex chemical formulation, which consists of the following ingredients: Film-Forming Agents: Nitrocellulose forms the hard, glossy film on nails. Plasticizers: Camphor is one of the plasticizers that make polish elastic and not easily prone to chipping. Solvents: Ethyl acetate and butyl acetate keep it in liquid form so that it can be applied smoothly. Pigments and Dyes: These are used for color and opacity. They may be natural pigments or synthetic dyes. Resins and Polymers: They provide added strength and adhesion. Additives: UV stabilizers prevent colour fading and thickeners regulate viscosity. How it Works When applied to the nail, the solvents of the polish evaporate, and the surface of the nail is coated by the hard film. UV lamps for gel polish or quick dry sprays could make it happen in a shorter time. 3Middle Ages to the Modern Era   It was dying in Europe in the Middle Ages because it was considered an empty practice. However, it became a booming business elsewhere, particularly in Asia and the Middle East. The modern nail polish industry as we have today began to boom in the 1920s when French makeup artist Michelle Menard invented the first glossy lacquer based on automobile paint.   Contemporary Developments   The chip-resistant formulas, gel polish, and nail art pens were found in the 20th and 21st century. Today, nail polish is widely used all around the world with a value of billions of dollars, which tells that it is popular around the world and innovative as well.   2. The Science Behind Nail Polish   Composition   Modern nail polish is an extremely complex chemical formulation, which consists of the following ingredients:   Film-Forming Agents: Nitrocellulose is the nitro compound that forms a hard, glossy film on nails. Plasticizers: One of the plasticizers in polish is camphor, which renders it elastic and not easily prone to chipping. Solvents: Ethyl acetate and butyl acetate retain it in liquid form so that it may be applied smoothly. Pigments and Dyes: These add color and opacity to the nail polish. They can be natural pigments or synthetic dyes. Resins and Polymers: They are added for extra strength and adhesion.   Additives: UV stabilizers prevent colour fading and thickeners regulate viscosity. How it Works When applied to the nail, the solvents of the polish evaporate, and the surface of the nail is coated by the hard film. UV lamps for gel polish or quick dry sprays could make it happen in a shorter time. 6. Healthy Nails Nail Care Tips Hydration: Hydrate your nails and cuticles to avoid breakability. Balanced Diet: Rich food in biotin will give healthy nails Breaks: Take a break to your nails between applications as avoiding wear and tear Removal: One may prefer non-acetone remover as well not to remove off because it may remove out nail surface. Common Issues and Solutions Yellowing of Nails: Take Whitening treatment or make breathe for the nails to give polish off. Crushing and Stripping: Never over buff and keep wet nails. Fungal Infections: See a doctor if color and thickness persists. 7. Environmental Impact of Nail Polish Problems Nail polish production and waste produce chemical as well as plastic-based packaging-related pollution. When the solvents and pigments from the manufacturing are not disposed of properly, they become hazardous to the environment. Greener Approach Use a brand whose package is recyclable with nontoxic formula. Dispose of used polish via hazardous waste programs. Market from vegan and cruelty-free companies. 8. Business of Nail Polish Market Trends The nail polish market is surging at a rapid rate, and the demand for gel and breathable formulas is in growth. Consumers are highly driven by Instagram and TikTok websites. A nail polish business can be quite profitable if targeted towards some niches, like organic or even halal-certified polishes. Nail polish is that mixture of art, science, and personal expression that has endured since the very first days of the invention. Because its popularity could well have lasted the test of time; the style has been able to embrace what is in vogue while the time that moves with technology and yet stay approachable

elegance, nails

How to grow nails faster

How to grow nails faster: a Complete Guide Long and healthy nails are often considered a sign of beauty and care. You might want to have longer nails for showcasing your favorite nail designs or to grow stronger and healthier nails. Whatever be the reason, growing them faster is quite common. This complete guide gives you practical tips, scientifically proven advice, and natural remedies that can help you grow your nails healthily and fast. Table of Contents Understanding Nail Growth Factors Influencing Nail Growth Dailies to Grow Nails Faster Nutrition for Healthy Nails Natural Remedies for Nail Growth Products and Treatments to Boost Nail Growth Avoiding Nail Damage Myths and Facts About Nail Growth Conclusion 1. Nail Growth Understanding Nails are made of keratin, the same protein your hair and skin are composed of. The nail growth starts in the nail matrix that is hidden under the cuticle at the base of your nail. New cells produced in the matrix push out the old cells, forming the hard, visible part of the nail. Fingernails grow, on average, about 3 millimeters per month, though the rate varies for several reasons. Nail Growth Cycle: Nail Formation: Starts at the matrix. Nail Plate Development: Old cells are compressed into a tough plate. Growth: The nail plate grows as new cells are produced. 2. Factors Influencing Nail Growth Before discussing how to grow nails faster, let’s discuss the factors influencing nail growth: A. Age Nail growth slows down with age due to decreased circulation and cellular renewal. B. Genetics Your genetics would decide how thick or strong it grows and at what speed. C. Diseases Hypothyroidism, psoriasis, and some types of anemia tend to slow down nail growth. D. Nutrition Nail growth slows down when one fails to get some required nutrients: biotin, zinc, or vitamins. E. Environmental Factors Over-watering, chemicals, and mechanical trauma can cause a crack in the nail as well as slow its growth speed. 3. Habits to Increase the Rate of Nail Growth You may feel like small changes in your habits, but the difference may be huge when it comes to the health and length of your nails. Some habits have already been set, which include: A. Moisturizing the Nails and Cuticles Apply cuticle oil or hand cream and seal it in. Use creams with high contents of ingredients like jojoba oil, vitamin E, or shea butter. B. Nails Care to Ensure That They are Clean and Well Trimming Trim your nail regularly to prevent breakage Smoothen your nail ends using a soft nail file. C. Massage Your Fingers Massage stimulates blood flow towards the nail matrix, and thus growth is enhanced. Apply natural oil such as coconut or olive oil for more advantages D. Protect Your Hands Wear gloves while washing or cleaning dishes to limit your exposure to chemicals and water. Don’t bite your nails or even us them as a tool E. Hygiene Make sure your nails are kept clean so that infections aren’t caused which weaken your nails Use a soft brush to brush under your nails. 4. Nutrition for Healthy Nails Your diet dictates the growth of your nails. A balanced diet comprised of specific nutrients will enhance your nail strength and support healthy growth. Essential Nutrients for Nail Growth Biotin (Vitamin B7) This vitamin assists in the formation of keratin Food sources: Eggs, nuts, seeds, sweet potatoes Vitamin E This vitamin helps in moisturizing the nails and prevents breakage Food sources: Spinach, almonds, sunflower seeds. Protein This is a significant component in the formation of keratin Food sources: Lean meat, fish, beans, tofu. Zinc These help in the formation and repair of cells Food sources: Pumpkin seeds, shellfish, whole grains. Iron Help in the prevention of ridges and brittleness. Food sources: Red meat, lentils, spinach. Omega-3 Fatty Acids Inhibits inflammation and nourishes the nails Food-rich sources: Fatty fish, walnuts, flaxseeds. 5. Natural Remedies to Enhance Nail Growth Natural remedies aid in enhancing nail growth. Among some tested methods include the following: A. Coconut Oil Massage warm coconut oil on your nails to enhance their moisture and strength. B. Lemon Juice Add lemon juice to olive oil, soak your nails in the mixture for 10 minutes, enhance growth and eliminate discoloration of your nails. C. Garlic Apply garlic paste or garlic infused oil directly to your nails to make them grow. D. Horsetail Tea Dip your nails in horsetail tea, which is rich in silica and antioxidants. E. Essential Oils Lavender, tea tree, and eucalyptus oils also help strengthen nails and inhibit infections. 6. Product and Treatments for Fast Nail Growth Using specific products may enhance the growth of nails faster. A. Nail Strengtheners These are nail products that make your nails hard hence prevent breaking B. Growth-Enhancing Serums These serums may have keratin, peptides, or biotin and may support the growth of nails. C. Supplements Biotin, collagen, or multivitamin supplements could be used for healthy nail care. D. Professional Treatments See a dermatologist to get laser treatment or medicated creams. 6. Products and Treatments to Enhance Nail Growth Using special products can be an added incentive to your nail growth. A. Nail Strengtheners Help harden nails so that they do not break easily. B. Growth-Enhancing Serums These contain keratin, peptides, or biotin to promote faster growth. C. Supplements Biotin, collagen, and multivitamin supplements can be effective for nail health. D. Professional Treatments Consult a dermatologist for laser treatments or medicated creams. 7. Avoiding Damage to Nails Preventing damage is just as important as growth promotion. Here’s how to prevent the damage of your nails: A. Avoid Acrylics and Gel Polishes The frequent use of such will weaken your nails. B. Avoid Harsh Chemicals Use acetone-free nail polish removers. C. Avoid Excess Water Exposure to excessive water will soften your nails, thus prone to damage. D. Handle Your Nails Gently Never tap your nails on any hard surface or use them as a pry for opening items. 8. Nail Growth Myths and Facts

Get Free Shipping on orders of PKR 5000 or more!Start Shopping

Price Based Country test mode enabled for testing United Arab Emirates. You should do tests on private browsing mode. Browse in private with Firefox, Chrome and Safari

Scroll to Top