Mehasa

elegance

elegance, nails

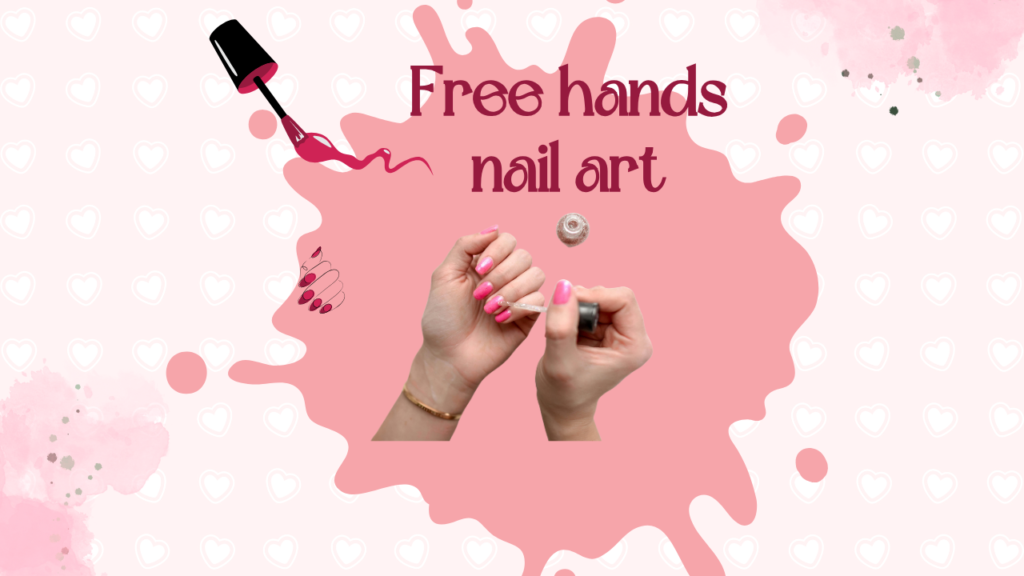
Gel Nail Art: The Ultimate Guide to Long-Lasting Beauty

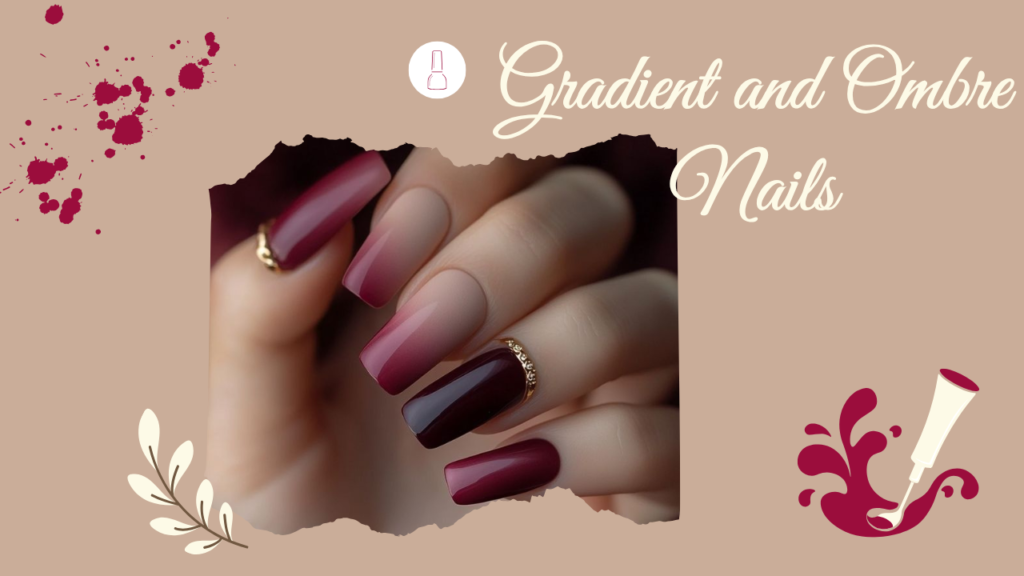
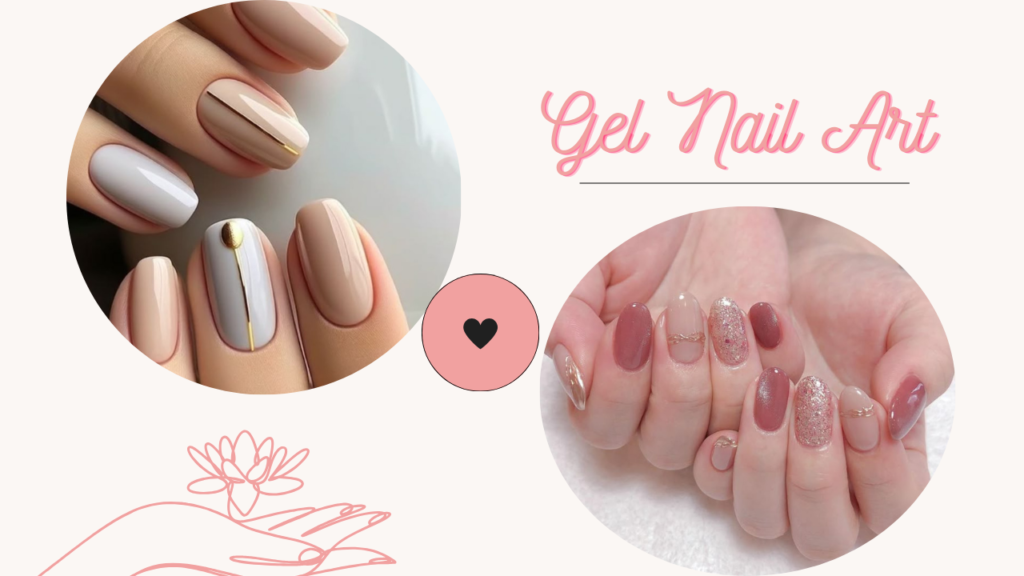
Gel nail art is one of the most popular and durable nail art techniques today. Known for its long-lasting finish and ability to create flawless designs, gel nails have revolutionized the world of nail art. Whether you’re looking for a classic, elegant design or something more intricate and creative, gel nail art offers endless possibilities. In this article, we will explore what gel nails are, the different types of gel nail art, and how to apply and maintain them for long-lasting results. What are Gel Nails? Gel nails are a type of artificial nail enhancement that uses a gel-based formula to create smooth, strong, and shiny nails. The gel is applied to the natural nail or artificial tips and is cured under a UV or LED lamp. Unlike regular nail polish, which dries naturally, gel nails need to be hardened under a light to set the gel, giving them a more durable and glossy finish. There are several types of gel nails, including soft gel, hard gel, and gel polish, each with its own unique properties and application techniques. Types of Gel Nails 1. Gel Polish: This is the most common form of gel nails. Gel polish is similar to regular nail polish, but it’s made from gel, giving it a longer-lasting finish. It’s easy to apply and is usually used for regular manicures, providing a glossy and durable finish that can last up to two weeks without chipping. 2. Hard Gel Nails: Hard gel nails are used to extend the natural nails and are applied over tips or forms to create length. They are thick, strong, and can be molded into various shapes, offering a more sturdy and long-lasting result. 3. Soft Gel Nails: Soft gels are more flexible and are used for creating intricate designs and artwork. They are less rigid than hard gels, which makes them easier to work with when designing nail art. Benefits of Gel Nail Art Durability: One of the biggest advantages of gel nails is their long-lasting durability. Unlike traditional nail polish, gel nails can last anywhere from two to three weeks without chipping or fading. Shine and Gloss: Gel nails have an incredibly glossy finish that stays intact throughout the duration of wear, giving your nails a polished, high-end look. Strength: Gel nails provide additional strength and protection for natural nails, preventing them from breaking or chipping easily. Quick Drying: The gel formula requires curing under UV or LED light, making the drying process faster than traditional nail polish. No more worrying about smudging your nails while waiting for them to dry. Versatility: Gel nails are perfect for all kinds of nail art, from simple designs to more intricate and creative patterns. The smooth surface of the gel makes it easier to work with when creating nail art designs. How to Apply Gel Nail Art Step 1: Prepare Your Nails Before applying gel polish, it’s essential to prepare your nails properly. Start by cleaning your nails, removing any old polish, and filing your nails to the desired shape. Push back your cuticles and ensure your nails are free of oils and dirt. Step 2: Apply a Base Coat Apply a thin layer of gel base coat to your nails and cure it under a UV or LED lamp. The base coat helps the gel polish adhere to the nails better and provides a smooth surface. Step 3: Apply Gel Polish Apply a thin layer of your chosen gel polish color to your nails. Be sure to cover the entire nail surface and avoid the cuticle area. Cure the polish under the UV or LED lamp for the recommended time (usually 30-60 seconds). Step 4: Apply Additional Layers Depending on the opacity of the gel polish, you may need to apply a second or third layer. Be sure to cure each layer under the light before applying the next one. Step 5: Apply a Top Coat Once you’ve achieved the desired color and design, apply a top coat to seal in the gel polish. This layer adds extra shine and durability to your gel nails. Cure the top coat under the lamp. Step 6: Cleanse and Finish After curing the final layer, your nails may have a sticky residue. Use a nail cleanser or alcohol wipe to remove this tacky layer. Your nails are now ready for a flawless, long-lasting finish! Gel Nail Art Designs The versatility of gel nails allows for endless nail art possibilities. Some popular gel nail art designs include: French Manicure: A classic and timeless look that can be easily created with gel polish. The clean, white tips and natural base create an elegant and polished appearance. Ombre Nails: Blend two or more colors seamlessly for a soft gradient effect. Ombre nails are perfect for gel nail art because the smooth texture of the gel polish helps to create the perfect blend. Geometric Designs: Create bold lines, triangles, and other geometric shapes with gel nail art. The smooth surface of gel nails makes it easier to draw precise and sharp shapes. Floral Patterns: Use gel polish to create intricate floral designs on your nails. Gel polish is perfect for delicate artwork like flowers, as the gel holds the design in place for longer. Glitter Nails: Add some sparkle to your nails with gel glitter designs. Gel polish allows you to create glittery nail art that lasts for weeks without fading or chipping. Maintaining Gel Nail Art While gel nails are known for their durability, proper maintenance is key to ensuring they last as long as possible: 1. Avoid Harsh Chemicals: Try to avoid exposing your gel nails to harsh chemicals or cleaning products, as they can weaken the gel and cause it to lift. 2. Moisturize Your Cuticles: Keep your cuticles and nails moisturized to prevent dryness or damage. This will also help maintain the health of your natural nails. 3. Avoid Biting Your Nails: Biting your nails can cause the gel to crack or chip. Be mindful

elegance, nails

Gradient and Ombre Nails: A Beautiful Blend of Colors

give nails a unique and beautiful color effect. Both of these techniques are based on the gradual blending of colors, which creates a soft, elegant, and impactful look. In this article, we will explore gradient and ombre nails, the difference between them, and how to create them.In the world of nail art, gradient and ombre nails are popular and stunning techniques that What are Gradient Nails? Gradient nails are a nail art technique in which two or more colors are blended in such a way that they merge smoothly into one another. This technique gives a beautiful, seamless transition between different colors on the nails. Typically, gradient designs are created by blending two colors, but you can use as many colors as you like to create a stunning effect. How to Create Gradient Nails: 1. Prepare Your Nails: Clean your nails, shape them, and apply a base coat to ensure the polish adheres well and lasts longer. 2. Choose Your Colors: Pick two or more colors for your gradient. Typically, a lighter color and a darker color work best for a noticeable and beautiful transition. 3. Sponge Technique: To create the gradient effect, use the sponge technique. Apply different colors of polish to a makeup sponge and then gently press it onto the nails to create a smooth, blended effect. 4. Allow to Dry: Let the nails dry for a while. If necessary, you can apply another layer to make the colors more vibrant and defined. 5. Top Coat: Finally, apply a clear top coat to seal the design and give it a shiny finish. What are Ombre Nails? Ombre nails are similar to gradient nails, but the blending of colors in ombre nails is typically more subtle and uniform. In ombre nails, one color fades gradually into another, creating a smooth, beautiful transition. This technique is often done from a lighter color to a darker color, such as from pink to blue or yellow to gold. How to Create Ombre Nails: 1. Prepare Your Nails: As with gradient nails, start by cleaning and shaping your nails and applying a base coat. 2. Choose Your Colors: For ombre nails, it’s common to use a light color, such as white, pink, or nude, and pair it with a darker color like blue, black, or gold. 3. Sponge Technique: Like the gradient technique, use a sponge to apply the light and dark colors to your nails, ensuring a soft and smooth transition. 4. Allow to Dry: You can apply one or two layers of polish to achieve a more intense ombre effect. 5. Top Coat: Apply a clear top coat to seal the ombre design and give it a glossy finish. Difference Between Gradient and Ombre Nails While both gradient and ombre nails are based on blending colors, there is a key difference between the two techniques: 1. Gradient Nails: The blending of colors in gradient nails is usually softer and occurs in a more horizontal fashion. This technique allows for the use of more colors, which creates a more intricate and dynamic look. 2. Ombre Nails: Ombre nails have a more subtle and uniform transition between colors, typically going from light to dark in a vertical fashion. This technique tends to look more smooth and elegant. Benefits of Gradient and Ombre Nails Beauty and Variety: These techniques allow you to decorate your nails with various colors and always look beautiful and stylish. Easy to Create: With the sponge or striping tool method, you can easily create these looks at home, requiring minimal skill and effort. Perfect for Any Occasion: Whether you’re looking for soft and light colors for everyday wear or bold, eye-catching hues for a special event, gradient and ombre nails offer versatility and style. Conclusion Gradient and ombre nails are fantastic nail art techniques that transform your nails into unique and beautiful works of art. These techniques offer a smooth transition between colors, giving a fresh and elegant look to your nails. Both gradient and ombre nails are easy to create and are perfect for any occasion, whether casual or formal. If you want to give your nails a distinctive and elegant touch, gradient and ombre nails are the perfect choice  

elegance, nails

Nail Stencils & Stickers: A Quick and Easy Way to Create Stunning Nail Art

Nail art has become an essential part of beauty and fashion, and while freehand designs can look amazing, they often require skill and patience. For those who want beautiful nails without the intricate effort, nail stencils and stickers are the perfect solution. These tools allow you to achieve professional-looking designs with minimal effort, and they come in a variety of patterns, shapes, and sizes to suit any style. What Are Nail Stencils and Stickers? Nail Stencils are templates made of paper, plastic, or vinyl with cut-out designs. They are placed on the nail, and polish is applied over the stencil. When removed, the stencil leaves behind the design on the nail. They are great for creating sharp, clean lines and intricate designs without the need for steady hands. Nail Stickers are pre-made designs or patterns that are adhered to the nails. They come in various styles, from simple colors and patterns to more elaborate designs like flowers, animals, or even 3D effects. Nail stickers are easy to apply, and many come in peel-and-stick form, making them hassle-free. Types of Nail Stencils 1. Basic Stencils: These include simple shapes, like circles, stripes, hearts, or geometric patterns. They are perfect for creating minimalist designs or adding little accents to your nails. 2. Floral Stencils: Floral patterns are always a favorite, and these stencils allow you to create beautiful, delicate floral designs in just a few steps. 3.Intricate Stencils These stencils are more detailed and can create complex patterns like lace, mandala designs, or intricate lacework. These are perfect for more experienced users who want to try something unique. 4.Negative Space Stencils: These stencils are designed to leave spaces on the nail open while painting the rest. This style creates a contrast between the painted areas and the natural nail, providing a trendy, minimalist look. 5. French Tip Stencils: These stencils are designed for creating classic French manicures with perfect, clean lines. They help you achieve a sharp, defined tip without the mess. 6. Seasonal or Themed Stencils**: From holiday designs like Christmas trees or pumpkins to more niche themes like animal prints or geometric shapes, these stencils are tailored to specific occasions or seasons. Types of Nail Stickers 1. Peel-and-Stick Stickers:** These are the easiest to apply. You simply peel them off the backing and stick them to your nails. They come in all sorts of designs, including animal prints, florals, glitter, and even holographic patterns. 2. Water Decals: These stickers require you to soak them in water before applying. They are perfect for delicate, intricate designs and are available in a variety of themes like flowers, stars, and abstract art. 3.3D Stickers: These are elevated stickers that provide texture and dimension to your nails. They often feature rhinestones, gems, or embellishments that make the nails stand out. 4.Metallic Stickers: These are often made of thin metallic foil, which creates a shiny, reflective surface on your nails. They add a touch of glam and are perfect for special occasions. 5.Glitter Stickers Glittery stickers can add a touch of sparkle to your nails. They are available in a range of colors and glitter sizes, making them a fun option for parties or festive events. 6. Custom Sticker: You can even create your own custom nail stickers with unique designs or personal patterns to match your style. Many companies offer online tools for creating custom stickers based on your own artwork or preferences. How to Use Nail Stencils 1.Choose Your Design: Select the stencil design that you want to use on your nails. You can opt for simple shapes for a minimalist look or more complex patterns for a bold design. 2. Prep Your Nails: Start by cleaning your nails and applying a base coat. This ensures that your nails are smooth and the stencil adheres better. 3.Apply the Stencil: Place the stencil firmly on your nail, making sure it covers the areas you want to stay free of polish. Some stencils come with adhesive backing to help them stick to your nails. 4. Apply Nail Polish: Using your desired color of nail polish, apply a thin layer over the stencil. Be sure to cover the open areas completely with polish. You can use a sponge for a more textured effect or apply it directly with the brush. 5. Remove the Stencil: While the polish is still wet, carefully remove the stencil to reveal the clean design. If needed, use a cotton swab to clean up any mistakes or excess polish around the edges. 6. Top Coat: Apply a top coat to seal the design and add shine. This step also helps to make the design last longer. How to Use Nail Stickers 1. Prepare Your Nails: Clean your nails, shape them, and apply a base coat. This will help the stickers stick better and last longer. 2. Choose Your Sticker: Pick the nail sticker that best matches your desired design. You can choose a single sticker for one nail or multiple stickers for a full design. 3. Apply the Sticker: Peel the sticker from its backing and place it on your nail. Press it down gently to ensure it adheres to the nail surface. Smooth out any air bubbles or wrinkles by using a soft tool or your fingers. 4. Trim and Shape If the sticker is larger than your nail, you can trim the excess around the edges using a small pair of scissors or a nail file to shape it. 5. Seal the Design: Apply a top coat to protect the sticker and to ensure it lasts longer. The top coat also adds a shiny finish to the design. Benefits of Nail Stencils and Stickers 1. Ease of Use: Nail stencils and stickers make nail art accessible to everyone, regardless of skill level. Even beginners can create stunning designs in minutes. 2. Time-Saving: These tools save time, especially for those who want beautiful nails but don’t have the time to do intricate freehand designs. 3. Variety of Designs: There is an endless variety

elegance, nails

Water Marbling Nail Art: A Unique and Fascinating Technique

Water Marbling Nail Art: A Unique and Fascinating Technique Water marbling nail art is a stunning and creative way to create beautiful and intricate designs on your nails. This technique involves using water and nail polish to spread different colors over the surface of water, creating a marble-like pattern. The design is then transferred onto the nails using either a stamper or dipping method. Water marbling allows you to create unique and eye-catching patterns that would be difficult to achieve with freehand painting. What is Water Marbling Nail Art? Water marbling involves dropping different colored nail polishes onto the surface of water to create a unique marble pattern. This pattern is then transferred onto the nails. The technique creates complex and beautiful designs that are difficult to replicate using other methods. It gives the nails a marble effect, which is why it is named “water marbling.” Tools Required for Water Marbling To begin water marbling, you’ll need the following essential tools: Water: The water should be at room temperature, as the nail polish needs to spread smoothly over the surface. Nail Polish: You’ll need various colors of nail polish. It’s best to use fast-drying polishes for water marbling to ensure that the colors spread evenly on the water surface. Stick or Dotting Tool: These tools are used to spread the nail polish on the water and create different patterns. Top Coat: To seal the water marble design and give it a glossy finish, a top coat is necessary. Tape or Nail Guard: Use tape or a nail guard around your nails to prevent the polish from staining the skin. How to Do Water Marbling Nail Art: A Step-by-Step Guide Water marbling involves several steps, and it’s important to follow each one carefully to achieve the best results. Here’s how you can create beautiful water marbled nails: Prepare Your Nails: Start by cleaning and shaping your nails. Apply a base coat to protect your nails. You can also tape around the edges of your nails to avoid getting polish on your skin. Prepare the Water: Fill a small, clean container with room temperature water. Make sure the container is deep enough for your fingers to dip in. Drop the Nail Polish: Take your selected nail polishes and drop them one by one onto the surface of the water. Drop the polishes in multiple layers so that they spread and create a marble effect. Each color should be dropped in quick succession to form concentric rings. Create the Pattern: Use a stick or dotting tool to swirl the colors and create the marble pattern. You can experiment with different patterns, such as circles, lines, or any design that you like. Dip Your Nails: Once the design is ready, dip your nails into the water carefully. Place your nail just above the water’s surface and submerge it gently to transfer the design onto your nail. Make sure to do this quickly, as the nail polish can dry quickly. Apply a Top Coat: Once you’re happy with the design, apply a top coat to seal and protect the water marble. It will also give a shiny finish to your nails. Benefits of Water Marbling Nail Art Unique Designs: One of the best things about water marbling is that each design is unique. Since the nail polish spreads differently each time, you will always get a one-of-a-kind marble pattern. Color Blending: Water marbling allows you to blend different colors together to create stunning and vibrant designs that aren’t achievable with other nail art methods. Professional Results: Water marbling is an easy way to achieve professional-looking nail art at home. The results can resemble those of nail salon designs, making it an excellent option for DIY nail art enthusiasts. Challenges of Water Marbling Nail Art Difficult to Learn: Water marbling can be tricky to master, especially for beginners. It requires some practice to get the right technique and to create clean designs without mistakes. Nail Polish Selection: Not all nail polishes work well for water marbling. Some polishes may not spread properly on the water, while others dry too quickly to create a smooth pattern. It’s important to use the right type of polish for the best results. Messiness: Water marbling can get a little messy, especially around the water surface. You may end up with extra polish on your fingers or surrounding skin. Using tape or a nail guard around your nails can help prevent this. Tips for Successful Water Marbling Nail Art Temperature of Water: The temperature of the water is crucial. If the water is too hot or too cold, the nail polish won’t spread evenly. Room temperature water is ideal for this technique. Work Quickly: Nail polish dries fast, so you need to act quickly after dropping the colors onto the water. Swirl the colors and dip your nails without wasting time. Practice Makes Perfect: Water marbling takes practice. Don’t be discouraged if your first few attempts aren’t perfect. With time, you’ll get better at creating stunning designs. Conclusion Water marbling nail art is a creative and unique way to create beautiful and intricate designs on your nails. This technique allows you to blend different colors and create patterns that are difficult to achieve using other methods. While it may have a bit of a learning curve, once you master the technique, you can achieve stunning, professional-quality nail art at home. Whether you’re going for a vibrant mix of colors or a subtle, sophisticated marble look, water marbling offers endless possibilities for creativity. So, grab your nail polishes, try out this fun technique, and give your nails a beautiful marble makeover!  

elegance, nails

Stamping Nail Art: A Quick and Impressive Technique

Stamping nail art is a popular and easy-to-learn technique that allows you to create intricate and detailed designs on your nails with precision. It is one of the most time-efficient ways to achieve professional-looking nail art at home, and it’s ideal for both beginners and advanced nail artists. What is Stamping Nail Art? Stamping nail art involves using special plates that have designs etched into them, a scraper to remove excess polish, and a stamper to transfer the design onto the nail. The stamper is a rubber or silicone tool that picks up the design from the stamping plate and then transfers it onto your nails. This technique allows for consistent and detailed patterns without needing a steady hand for freehand painting. Tools Needed for Stamping Nail Art To get started with stamping nail art, you will need the following tools: Stamping Plates: These are metal plates with various patterns and designs etched into them. Some plates feature floral patterns, geometric designs, and more. You can find plates with specific themes like holidays or nature. Stamping Polish: Special nail polishes are used for stamping. They are usually thicker and more opaque than regular polishes, which helps them transfer more clearly onto the nail. You can use different colors for a multi-colored design. Scraper: The scraper is used to remove the excess polish from the stamping plate after you apply it. It is typically made from plastic or metal. Stamper: This is a rubber or silicone tool that picks up the design from the stamping plate and transfers it onto your nails. Stamper heads come in different sizes, and some are clear for better visibility. Top Coat: A clear top coat is used to seal the design and give your nails a shiny finish. It also helps the design last longer. How to Do Stamping Nail Art: A Step-by-Step Guide Prep Your Nails: Start by cleaning and trimming your nails. Apply a base coat to protect your nails and provide a smooth surface for the stamping. Apply the Stamping Polish: Choose a stamping polish and apply a generous amount over the design on the stamping plate. Scrape the Excess Polish: Use the scraper to remove any excess polish from the plate, leaving the design in the etched lines. Make sure you scrape in a straight motion to ensure the design is clean and sharp. Pick Up the Design with the Stamper: Quickly roll the stamper over the design on the plate to pick it up. Be sure to do this swiftly, as the stamping polish can dry fast. Stamp the Design onto Your Nail: Gently press the stamper onto your nail and roll it slightly to transfer the design evenly. You can position the design however you like on the nail. Seal with Top Coat: Once you are happy with the design, apply a top coat to protect the nail art and give it a glossy finish. Make sure to apply it gently to avoid smudging the design. Why Choose Stamping Nail Art? Quick and Easy: Stamping is one of the quickest nail art methods. It’s a great choice for people who want beautiful designs in a short amount of time. Precision and Detail: Stamping allows you to get intricate, professional-level designs without needing a steady hand or advanced painting skills. Versatility: There are a wide variety of stamping plates with numerous patterns, so you can create endless designs—from simple patterns to complex motifs. Cost-Effective: Stamping plates are relatively affordable and can be used repeatedly, making it a cost-effective option for creating salon-quality designs at home. Types of Stamping Nail Art Designs Floral Patterns: Floral designs are some of the most popular choices for stamping. You can create soft, delicate flower patterns or bold, colorful blooms. Geometric Shapes: If you love clean, sharp lines, geometric patterns like stripes, chevrons, or triangles work beautifully with stamping. Holiday and Themed Designs: Stamping plates often have designs for specific holidays like Christmas, Halloween, or Valentine’s Day. You can also find plates with seasonal designs like snowflakes or autumn leaves. Minimalist Designs: Simple patterns, dots, or lines can also be created with stamping for a minimalist, chic look. Advantages of Stamping Nail Art Consistency: Stamping allows you to replicate the same design on each nail, ensuring that the art looks consistent and clean. Time-Saving: Compared to freehand painting, stamping takes less time, making it ideal for those who want quick but intricate designs. Ease of Use: Even beginners can master the stamping technique with a little practice, making it a great choice for those new to nail art. Challenges of Stamping Nail Art Stamping Plate and Polish Quality: Not all stamping plates and polishes work equally well. Some plates may not have deep enough etching to transfer the design clearly, and some polishes may not pick up as easily. Transfer Issues: Sometimes, the design may not transfer perfectly, leaving part of the image behind or causing smudging. It may take a few attempts to get it right. Requires Practice: While stamping is easier than freehand art, it still requires practice to perfect your technique, especially in picking up the design correctly and transferring it smoothly onto your nails. Conclusion Stamping nail art is an excellent choice for anyone who wants to create detailed and intricate designs without needing to master freehand painting. With the right tools and a little practice, you can achieve salon-quality nail art in the comfort of your home. Whether you’re looking for bold geometric patterns, delicate floral designs, or seasonal motifs, stamping offers endless possibilities to express your creativity.

elegance, nails, STYLE GUIDE

Freehand Nail Art: A Creative and Personal Approach to Nail Design

Freehand nail art is one of the most artistic and versatile methods of creating unique and intricate designs on your nails. Unlike other nail art techniques that require stencils, stamps, or tools like water marbling, freehand nail art allows the artist to use their creativity to paint directly on the nails, producing truly personalized results. What is Freehand Nail Art? Freehand nail art is the process of drawing or painting designs directly onto the nails without any external tools or templates. It involves using brushes, nail pens, and sometimes dotting tools to create a wide range of designs—from simple patterns to elaborate works of art. The freedom this technique offers means that almost any design is possible, allowing nail enthusiasts to create exactly what they envision. Tools Needed for Freehand Nail Art To get started with freehand nail art, you don’t need a long list of complicated tools. Here are the basic tools you will need: Fine-Tipped Brushes: These are essential for creating delicate lines, intricate details, and small designs. Nail Art Pens: Special pens for nail art can help you create fine lines and easy designs. Dotting Tools: Used to create dots, lines, or to enhance a design with a touch of creativity. Nail Polish: You’ll need various colors for your designs. Both regular and gel polish work for freehand designs.   Top Coat: To seal your design and give it a smooth, glossy finish. Techniques for Freehand Nail Art Simple Designs: Starting with basic shapes like stripes, dots, or checks is a great way to practice. For example, you can create diagonal stripes or a polka dot pattern with   a dotting tool. Floral and Nature Designs: Flowers, leaves, and vines are popular designs for freehand nail art. These are usually created using a fine-tipped brush or nail pens to paint each petal or leaf delicately. Geometric and Abstract Designs: Freehand is perfect for creating geometric patterns like triangles, squares, or chevron patterns. Abstract designs can also be drawn, where the focus is on shapes, lines, and colors without following a specific form. Character Art: If you’re feeling more adventurous, freehand nail art allows you to paint small illustrations or characters. You can create cute animals, cartoon characters, or even mini landscapes on your nails.   Why Choose Freehand Nail Art? Endless Creativity: Freehand nail art lets you explore unlimited creativity, as it is not confined to pre-designed patterns or stencils. You can mix colors, styles, and techniques to make something unique every time.   Personalization: You can create custom designs that reflect your personality, moods, or even celebrate holidays and special occasions like birthdays and weddings. No Special Equipment: Unlike other methods that require tools like stamping plates or foil, freehand nail art only requires a steady hand and the right brushes. Challenges of Freehand Nail Art While freehand nail art offers unmatched creativity, it does come with its challenges: Skill and Practice: Freehand designs require practice to perfect. It may take a few tries to get the lines straight or to create the right shapes. Time-Consuming: Depending on the complexity of the design, freehand nail art can take longer compared to other methods like stamping or using stickers. Conclusion Freehand nail art is an exciting and creative way to express yourself through your nails. Whether you’re creating simple designs or intricate patterns, the possibilities are endless. With practice, patience, and the right tools, anyone can master freehand nail art and showcase their unique designs with pride. So, grab your brushes and start creating your own stunning nail art today!

elegance

MAKEUP

The Art of Makeup: Transforming Your Look with Skill and Style Makeup is more than just a cosmetic tool; it’s an art form that allows individuals to express themselves, enhance their features, and, most importantly, feel empowered. Whether it’s the subtle accentuation of your natural beauty or a bold, artistic transformation, makeup has the power to change how you feel and how you are perceived. In the world of fashion, makeup is just as important as the clothes you wear. It’s a vital component of any look, whether you’re walking the runway, attending a photoshoot, or preparing for a night out. In this article, we’ll delve into the essentials of makeup, offer tips for achieving various looks, and discuss the current trends in makeup. Additionally, we’ll highlight how makeup can be used to complement your personal style, providing a guide to achieve flawless makeup for every occasion. The Importance of Makeup in Fashion Makeup is one of the most powerful tools in the fashion world. It helps create a polished, well-rounded look by enhancing the features, adding depth to the face, and bringing attention to specific areas like the eyes, lips, and cheekbones. Makeup allows individuals to express their mood, experiment with colors, and even match their look to their outfit, giving them the ability to adapt to different styles and trends. In the realm of fashion, makeup is crucial for: Completing the Look: Makeup helps elevate an outfit, bringing everything together. Whether you’re going for a chic, natural style or a bold, dramatic vibe, makeup can be tailored to your outfit for a cohesive appearance. Highlighting Features: Makeup enhances the natural beauty of a person’s features, such as the eyes, lips, and cheekbones, allowing them to stand out and create a striking impression. Self-Expression: Just like fashion, makeup is a form of self-expression. From soft, neutral tones to vibrant, colorful styles, makeup enables individuals to convey their personality and mood. Photography and Fashion Shows: In photoshoots and runway shows, makeup plays an important role in defining the model’s face, making it suitable for close-ups and ensuring it matches the creative direction of the shoot or show. Confidence Boost: Makeup allows individuals to feel more confident. It can cover imperfections, smooth skin tones, and highlight a person’s best features, resulting in a heightened sense of self-esteem. Essential Makeup Products: Building Your Kit Creating the perfect makeup look starts with the right tools. A high-quality makeup kit doesn’t have to be expansive or filled with unnecessary items; it just needs to contain the essentials that suit your face and desired look. 1. Primer: The Base for Flawless Makeup A primer is the foundation of any makeup routine. It prepares your skin by creating a smooth canvas, filling in pores, and ensuring the makeup stays put all day. For Oily Skin: Choose a mattifying primer to control shine and keep the makeup in place. For Dry Skin: Opt for a hydrating primer that adds moisture to the skin while ensuring makeup longevity. For Large Pores: Use a pore-minimizing primer to blur the appearance of pores and create a smooth base. 2. Foundation: Even Out Your Skin Tone Foundation is essential for creating an even complexion and covering imperfections. It’s important to choose a foundation that matches your skin tone and type for a natural, flawless look. For Oily Skin: Choose oil-free, long-wear foundations that control shine throughout the day. For Dry Skin: Opt for dewy, hydrating foundations that will give your skin a healthy glow. For Full Coverage: Full-coverage foundations are great for covering blemishes, dark spots, and redness. For Natural Coverage: Light to medium-coverage foundations offer a natural finish, allowing your skin to breathe. 3. Concealer: Hide Imperfections Concealer is used to cover blemishes, dark circles, redness, and other imperfections. It’s a versatile product that can be applied in specific areas to brighten the skin or mask spots. For Dark Circles: Use a peach or orange-toned concealer to neutralize dark circles before applying a skin-toned concealer. For Blemishes: Apply a full-coverage concealer to problem areas, blending it into the skin. For Brightening: Use a brightening concealer in a shade lighter than your skin tone to highlight the under-eye area or the center of the forehead. 4. Setting Powder: Lock Your Makeup in Place Setting powder is essential for setting foundation and concealer, ensuring that your makeup lasts throughout the day without slipping or creasing. A translucent powder works for most skin tones, but tinted powders can help with setting makeup on deeper skin tones. For Oily Skin: Choose a mattifying powder to absorb excess oil and keep shine at bay. For Dry Skin: Opt for a hydrating setting powder that won’t make your skin look cakey. 5. Blush: Add a Pop of Color Blush brings warmth and life to your complexion. It’s a simple way to make your face look healthier and more vibrant. The color you choose should depend on your skin tone and the look you’re going for. For Fair Skin: Soft pinks and peaches work best. For Medium Skin: Rose or coral shades will bring warmth to the face. For Dark Skin: Deep berries or plum tones create a beautiful flush. 6. Highlighter: Achieve a Radiant Glow Highlighter adds a luminous glow to the high points of your face, such as the cheekbones, brow bone, and down the bridge of the nose. It gives your face a fresh, glowing finish. For a Natural Glow: Choose a champagne or golden highlighter for a soft, dewy finish. For Bold Glow: Opt for a metallic or holographic highlighter for a striking, attention-grabbing look. 7. Eyeshadow: Define Your Eyes Eyeshadow enhances the eyes, adding dimension and drama to your look. Whether you’re going for a subtle neutral eye or a bold, smoky eye, eyeshadow is a key element in any makeup routine. For Daytime Looks: Neutral shades like beige, taupe, and soft brown are perfect for creating a natural, understated look. For Evening Looks: Bold shades like deep purples, blacks, and

elegance

HAIRS

The Ultimate Guide to Hair Care: Tips, Trends, and Techniques for Healthy, Stylish Hair Hair is one of the most important features that defines a person’s appearance. Whether it’s styled in intricate waves, sleek straight strands, or voluminous curls, hair has the power to shape how we feel and how others perceive us. For fashionistas, hair is not just an accessory—it’s an essential component of any look. From models strutting down the runway to the latest fashion magazines, healthy, vibrant hair is key to completing a stunning appearance. However, achieving beautiful hair requires more than just frequent salon visits and fancy hairdos. Proper hair care is vital to maintaining hair’s strength, texture, and overall health. In this article, we will cover the fundamentals of hair care, explore trending styles, and provide tips for achieving and maintaining gorgeous hair that complements your fashion choices. Why Hair Care Matters in Fashion In the world of fashion, hair is more than just a practical necessity—it’s an expression of personality, style, and creativity. A well-styled mane can transform an outfit and elevate a look, whether on the runway, a photoshoot, or at a red carpet event. Fashion icons like Rihanna, Zendaya, and Gigi Hadid have all been known to change their hair constantly, proving just how much of an impact hair can have on an overall look. Beyond aesthetics, proper hair care is essential for the following reasons: Health and Vitality: Healthy hair is strong, shiny, and free from split ends. It serves as a reflection of overall wellness. Completes the Look: Whether it’s a sleek ponytail, wild curls, or polished waves, a hairstyle can change the vibe of an outfit instantly. Confidence Boost: Healthy, styled hair can enhance self-esteem. When your hair looks great, it can empower you to feel confident, which is a crucial factor in the fashion industry. Protection: Hair care involves using products that not only beautify but also protect the hair from environmental damage, sun exposure, and heat styling. Understanding Your Hair Type: The First Step to Perfect Hair Hair care is not one-size-fits-all. Different hair types have different needs, and understanding your hair’s unique characteristics is crucial to selecting the right products and treatments. Hair types can broadly be categorized into four categories: straight, wavy, curly, and coily. Within each category, hair can be fine, medium, or coarse, and can range from oily to dry. Common Hair Types: Straight Hair: Sleek and shiny, straight hair lies flat against the scalp. Tends to get oily faster since the oils have an easy path down the length of the hair. Requires volume-boosting products if it feels flat or lifeless. Wavy Hair: Naturally forms loose, gentle waves. May become frizzy or unmanageable without proper moisture and frizz-control products. Works well with both volume and texture-enhancing products. Curly Hair: Forms distinct curls or ringlets. Can be prone to dryness due to its structure, which prevents natural oils from traveling down the strands. Needs moisturizing and anti-frizz products to keep curls defined and hydrated. Coily/Kinky Hair: Highly textured, coiled, or tightly curled hair. Prone to dryness and breakage if not properly hydrated and protected. Requires deep moisture and care to avoid frizz and maintain elasticity. Hair texture can also vary, even within the same type. It is important to consider hair texture, density, porosity, and elasticity when choosing products and treatment plans. For instance, fine hair may require lighter products, while thick or coarse hair may benefit from richer moisturizers and oils. Essential Hair Care Steps: A Daily Routine for Healthy Hair Taking care of your hair is a combination of choosing the right products, following the proper routine, and adopting healthy habits. Here is a breakdown of the most essential steps in a daily hair care routine. 1. Shampooing: Choose the Right Formula Shampoo is designed to cleanse the scalp and hair of dirt, oils, and build-up from styling products. However, over-shampooing or using the wrong formula can strip the hair of its natural oils, leading to dryness and breakage. For Oily Hair: Choose a clarifying or volumizing shampoo to remove excess oils and prevent greasiness. For Dry Hair: Opt for moisturizing shampoos that hydrate and nourish dry strands. For Curly Hair: Sulfate-free shampoos are a good option, as they help maintain the curl pattern and prevent frizz. For Color-Treated Hair: Use a sulfate-free shampoo specifically formulated for color-treated hair to preserve vibrancy and prevent fading. 2. Condition: Hydrate and Nourish Conditioner is essential for replenishing moisture and adding softness to the hair after shampooing. It smooths the cuticle layer and detangles hair, preventing breakage. For Dry or Curly Hair: Choose a rich, creamy conditioner with nourishing ingredients such as shea butter, argan oil, or coconut oil. For Fine Hair: Use lightweight conditioners that won’t weigh down your hair, leaving it limp. For Coily Hair: Look for deep conditioning treatments or leave-in conditioners to lock in moisture. 3. Hair Masks and Treatments: A Weekly Ritual While regular conditioners are important, deep conditioning treatments or hair masks can be incorporated once a week to restore hydration and address specific concerns like split ends, frizz, or hair damage. Ingredients like protein, keratin, and oils such as jojoba and olive oil help to strengthen hair and maintain its health. For Damaged Hair: Look for masks with protein and strengthening ingredients like biotin or keratin. For Dry Hair: Hydrating masks with shea butter or honey will deeply nourish and revive thirsty strands. For Curly Hair: Use curl-defining masks with moisturizing agents like aloe vera to keep curls bouncy and hydrated. 4. Heat Protection: Safeguard Your Hair Styling tools such as flat irons, curling irons, and blow dryers can cause damage if not used properly. Always use a heat protectant spray or serum before styling to shield your hair from heat damage. These products help reduce frizz, prevent split ends, and add shine. For Fine Hair: Opt for light, non-greasy sprays that won’t weigh down your hair. For Thick Hair: Use heat protectants with added moisturizing

elegance, skin

SKIN

The Ultimate Guide to Skin Care: Unlocking the Secrets for Radiant Skin in Fashion In the ever-evolving world of fashion, one thing remains constant: the importance of healthy, glowing skin. From the runways to the red carpets, flawless skin is often the most coveted beauty standard, with makeup artists, stylists, and photographers all working their magic to bring out the best in each model and celebrity. But while makeup can certainly enhance one’s features, it is proper skincare that provides the foundation for that natural, radiant glow we all crave. In this article, we’ll delve deep into the world of skincare, exploring essential routines, products, and lifestyle habits that can help anyone achieve clear, healthy, and youthful-looking skin. Whether you’re a beauty enthusiast, a fashion professional, or someone simply looking to elevate their skincare game, this guide will provide you with all the tips, tricks, and expert advice you need. Why Skincare Matters in Fashion When it comes to fashion, skin is not just an accessory — it’s the canvas. Whether you’re a model showcasing the latest designer pieces, a makeup artist preparing for a photoshoot, or a celebrity attending a major event, skin is at the forefront of your look. A clear complexion not only boosts confidence but also sets the tone for any beauty or fashion statement. The importance of skincare in fashion goes beyond just achieving a superficial glow. A well-maintained skincare routine helps with the following: Creating a Flawless Base for Makeup: Healthy skin holds makeup better, ensuring it lasts throughout long shoots or events without caking or wearing off. Improving Skin’s Appearance: With the right skincare products, you can reduce issues such as acne, fine lines, hyperpigmentation, and dryness, ensuring your skin looks as perfect as possible. Nurturing the Skin Underneath: The foundation of any good skincare regimen is taking care of the skin beneath the makeup. Without proper hydration, protection, and cleansing, even the most flawless makeup will not look its best. Boosting Confidence: Healthy skin naturally boosts self-esteem. When your skin feels good, you radiate confidence, which is essential in the fashion industry where appearance plays a huge role in success. Understanding Your Skin: Identifying Your Skin Type Before jumping into skincare products and routines, it’s crucial to understand your skin type. Different skin types require different approaches, so identifying your skin’s needs will ensure you are using the right products that provide the most benefits. Skin Types: Normal Skin: Balanced, neither oily nor dry. Small pores, few blemishes. Often feels smooth and hydrated. Skin is generally not sensitive to products. Oily Skin: Produces excess sebum (skin oil). Shiny appearance, especially in the T-zone (forehead, nose, chin). Larger pores and more prone to acne and blackheads. Dry Skin: Feels tight or rough. Prone to flakiness and irritation. Often lacks natural oils and can appear dull. Combination Skin: A mix of both oily and dry areas. Often oily in the T-zone and dry or normal on the cheeks. Sensitive Skin: Reacts easily to products or environmental factors. Redness, irritation, burning, or stinging sensations. Needs soothing, gentle products. Identifying your skin type can be done by observing how your skin feels and behaves throughout the day. You can also consult with a dermatologist or skincare professional who can help pinpoint the most effective skincare routine for your skin. The Essential Skincare Steps A good skincare routine is the foundation of healthy, glowing skin. Let’s break down the steps that should be included in every skincare regimen, along with the products and ingredients to look for. 1. Cleansing Cleansing is the first step in any skincare routine and should be done twice daily: once in the morning and once before bedtime. Cleansing removes dirt, oil, sweat, makeup, and other impurities that accumulate on the skin throughout the day. For different skin types, different cleansers work best: For Oily Skin: Opt for gel-based or foaming cleansers that deeply cleanse without stripping the skin of its natural oils. For Dry Skin: Choose cream-based or hydrating cleansers that are gentle and help retain moisture. For Sensitive Skin: Look for fragrance-free, gentle cleansers that won’t cause irritation. 2. Exfoliation Exfoliation removes dead skin cells from the surface of the skin, revealing a smoother, brighter complexion. Exfoliating once or twice a week (depending on skin type) can help prevent clogged pores and promote cell turnover. For Oily Skin: Exfoliating scrubs with salicylic acid are great for clearing out pores and reducing excess oil. For Dry Skin: Look for gentle exfoliators with hydrating ingredients like lactic acid or enzymes. For Sensitive Skin: Avoid physical scrubs and opt for mild chemical exfoliators like AHAs or BHAs. 3. Toning After cleansing, toning helps restore the skin’s natural pH balance and prepares it to absorb the following products. Toners can also add an extra layer of hydration and remove any residual impurities. For Oily Skin: Toners with ingredients like witch hazel or tea tree oil can help balance excess oil. For Dry Skin: Hydrating toners with glycerin or hyaluronic acid are excellent for adding moisture back into the skin. For Sensitive Skin: Opt for alcohol-free toners with soothing ingredients like chamomile or aloe vera. 4. Serum Serums are concentrated treatments packed with active ingredients that target specific skin concerns, such as acne, fine lines, dark spots, or dullness. Serums penetrate deeper into the skin than moisturizers, making them an essential part of your skincare routine. For Oily Skin: Look for lightweight, oil-free serums with salicylic acid or niacinamide to help control oil production and prevent breakouts. For Dry Skin: Hyaluronic acid serums are ideal for deep hydration and plumping the skin. For Sensitive Skin: Choose soothing serums with ingredients like calendula or rosehip oil. 5. Moisturizing Moisturizing is a crucial step to maintain the skin’s hydration and keep it soft and supple. Regardless of skin type, everyone needs to moisturize to lock in hydration and protect the skin from environmental damage. For Oily Skin: Choose oil-free, lightweight moisturizers that won’t clog pores. For Dry

elegance, nails

Nails shape

Nail Shapes: A Complete Guide to Choosing the Perfect Style Nail shapes are an important way of expressing personality and style. Whether you want a subtle, natural look or a bold and dramatic effect, the shape of your nails can change the look of your hands and tell the world who you are. In this article, we will explore the different nail shapes, their characteristics, and how to choose the perfect one for your style and lifestyle. At the end of this, you will have a complete understanding of nail shapes and factors to consider when deciding on the ideal shape for your hands. 1. Understanding Nail Anatomy The first thing necessary to understand about nail forms is the basic anatomy. Nails have several key parts, which include Nail Plate: this is the visible part of the nail. Nail Bed: this is the underside of the nail plate under the skin. Cuticle: this is the protective skin which is at the base. Free Edge: this can be described as the piece of the nail that actually extends beyond the fingertip. Lunula: A crescent-shaped white piece at the base of the nail. Understanding these details makes a difference because each matters in how different shapes will file and hold up differently. 2. Famous Shapes of Nails So many shapes to choose from all offer unique aesthetics along with practical advantages. So here are the most common popular nail shapes: a. Boxed Nails Definition: Edges are flat as well as squared. Hard corners give a boxlike appearance. Who Would Work Well For: Suitable for people with sturdy nails, which do not bend when they try to maintain their shape. For very wide nail beds because straight sides enhance the look of width Pros: Square cuticle-friendly and hassle-free Chip-resistant hence very useful for everyday wear Cons Makes shorter fingers appear chubby Styling tips Wear them in modern bold colors or interesting designs. b. Round Nails Features: Silhouette: Shapely yet subtle. The shape of the curve is round with a softened tip. Overall appearance: Soft, and understated. Who Is It Suitable For: Anyone looking for a traditional and classy appearance. Ideal for shorter nails or more conservative styles Benefits: Very low maintenance. Less prone to breaking. Glamorises all fingers, especially short fingers. Downsides: Limited drama in terms of design Styling Tip: Combine round nails with neutral tones and simple designs to achieve timelessness. c. Oval Nails Features: Tapered sides with softly rounded tip. Elongated and elegant silhouette. Who It’s For: Ideal for narrow nail beds. Perfect for those who want to lengthen the look of the fingers. Advantages: Versatile and suitable for many styles. Adds feminine and sophisticated feel. Disadvantages: Needs maintenance often to keep it in the shape. Styling Tips: Pastel colors or simple floral designs will help to achieve the feminine look of an oval nail. . Almond Nails Characteristics: Nacile sides that narrow into an oval-shaped pointed tip Elegant appearance Who it suits: Can be used for the perception of longer slimmer finger Recommended with medium-long nail length. Pros; Trendy and Sophisticated. Nails can have good intricate arts and adhesions as well. Cons; The broken tip can occur easily therefore demanding proper care Styling Tips Play with some great ombre effects. Add rhinestones to create elegant almond-shaped nails. e. Coffin/Ballerina Nails Characteristics: Sides are tapered with flat, squared-off tip. Resemble a coffin or ballerina slipper Who It’s For: Best suited to those having long, strong nails or acrylic extensions Those who are trendsetters and fashion fanatics. Pros: Makes a tremendous style statement by appearing bold and dramatic. It has many spaces for elaborate nail art. Cons: Highly maintenance sensitive to breaking. How to Style It: Use bright colors, geometric patterns, or glitter to create contrast with this edgy shape. g. Stiletto Nails Characteristics Sharp, tapering tip. Dramatic, eye-catching. Who It’s For: Great for fashionistas seeking a statement look. Pair well with acrylic or gel extensions for added durability. Pros: Uniquely attention-grabbing. Fantastic canvas for creative nail art. Cons: Breaks easily and not very practical for everyday wear. Styling Tips: Pair metallics, chrome finishes, or 3D nail art with stiletto nails to really bring out the drama of this style. . Squoval Nails Characteristics: A hybrid of square and oval shapes. Edges are straight, but the tip is slightly rounded. Who It’s For: Perfect for those who require the functionality of square nails with the gentleness of oval nails. Flatters all types of nail length and finger type. Benefits: Strong and versatile. Great to maintain yet polished. Drawbacks: It may not have a drama that other shapes have. Styling Tips: Pair squoval nails with the classic French manicures or gradient designs for a sophisticated look. h. Flare Nails Characteristics: Extremely flared-out tips that resemble a fan. Very bold and unconventional. Who It’s For: For those who want to make a statement. Creative and artistic personalities. Advantages: Eye-catching and unique. Large surface area for intricate designs. Disadvantages: Not very practical for everyday tasks. Not good for weak or brittle nails. Styling Tips: Vibrant colors, textured finishes, and intricate patterns are the way to go for flare nails. i. Lipstick Nails Characteristics: Asymmetrical slanted tip resembling a lipstick bullet. Modern and edgy design. Who It’s For: Great for those who want to try something different and on-trend. Good for acrylic or gel extensions. Benefits: The unique and creative shape. Really stands out in a crowd. Drawbacks: It requires exact filing and maintenance. Style Tips: Diagonal patterns or contrasting colors can make the unique shape stand out. 3. Factors to Consider When Choosing a Nail Shape a. Finger Shape and Length The shape and length of your finger can determine which type of nail shape will look great. For example, Your short fingers make elongated shapes like almond or oval look good. For people whose fingers are wide, squoval or round shapes tend to create a balanced appearance. b. Nail Bed Width The width of your nail bed determines how specific shapes appear. Narrowly

Get Free Shipping on orders of PKR 5000 or more!Start Shopping

Price Based Country test mode enabled for testing United Arab Emirates. You should do tests on private browsing mode. Browse in private with Firefox, Chrome and Safari

How can I help you?