Nail foils have become a popular trend in the world of nail art, offering a quick and eye-catching way to add some sparkle, shine, and creativity to your nails. Whether you prefer a subtle, metallic look or a bold, colorful design, nail foils can be used to create unique and stunning effects that elevate your manicure.
What Are Nail Foils?
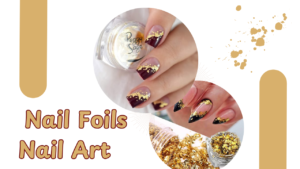
Nail foils are thin sheets of metallic, holographic, or patterned material that can be applied to the nails to create a shiny, reflective, and often textured finish. These foils come in a variety of colors, patterns, and finishes, such as gold, silver, rose gold, holographic, and even designs like animal print or marble.
The foil is typically applied over a layer of adhesive or gel polish, and it can be easily pressed onto the nail’s surface to create intricate designs or simply add a touch of glam. Nail foils are commonly used to accentuate a manicure, cover the entire nail, or even highlight specific areas like tips, edges, or stripes.
- How to Apply Nail Foils
Applying nail foils is relatively easy and requires only a few materials. Here’s a step-by-step guide on how to achieve stunning nail foil designs:
Materials Needed:
– Nail foil sheets (metallic, holographic, patterned)
– Base coat and top coat
– Nail adhesive (or foil glue)
– Tweezers or a small brush (for precise application)
– Nail file and buffer
– Gel polish (optional for a longer-lasting effect)
- Steps:
1. Prepare the Nails: Start by removing any old polish and gently push back your cuticles. Trim and file your nails to your desired shape. Buff the surface of the nails to create a smooth base for the foil.
2. Apply a Base Coat: Apply a base coat to protect your natural nails and ensure the foil will adhere properly. Let it dry completely before moving on to the next step.
3. Apply Nail Adhesive: Using a brush or applicator, apply a thin layer of nail adhesive or foil glue where you want the foil to stick. This can be on the entire nail or just certain sections for a more abstract design. Allow the adhesive to dry for a few seconds, but it should still be slightly tacky.
4. Apply the Nail Foil: Take a piece of your chosen nail foil and press it gently onto the adhesive-coated nail. Use tweezers or your fingers to press it firmly onto the surface. You can apply the foil in a full coverage style or place it strategically to create accents or patterns.
5. Remove Excess Foil: After applying the foil, gently peel off any excess foil, leaving the design on the nail. If necessary, you can use a brush or your fingers to smooth and adjust the foil placement.
6. Seal with a Top Coat: Once you’re happy with the foil design, apply a top coat over the entire nail to seal the foil in place. This step will help the foil last longer and prevent it from lifting. Be sure to use a non-wipe top coat if you’ve used gel polish.
7. Allow to Dry: Let your nails dry completely before handling them to avoid smudging the design.
- Why Choose Nail Foils?
Nail foils offer several benefits that make them an attractive option for nail art enthusiasts:
Easy Application: Nail foils are relatively simple to apply compared to other nail art techniques, and they require minimal tools.
Versatility: With a wide range of colors, patterns, and finishes, nail foils can be used to create a variety of looks, from subtle and chic to bold and extravagant.
Durability: When sealed properly with a top coat, nail foils can last for several days, making them a long-lasting addition to your manicure.
Instant Glam: Nail foils instantly add a luxurious and shiny finish to your nails, giving them a glamorous and polished look.
Popular Nail Foil Designs
- Metallic Foils: Gold, silver, and rose gold foils are a classic choice for a chic, elegant look.
Holographic Foils: These foils change color depending on the light and are perfect for a fun, eye-catching effect.
Marble or Animal Print Foils: Patterned foils, like marble or animal prints, add an edgy and fashionable touch to your nails.
Gradient Foils: Some people create ombré or gradient effects using different foil colors, blending from one to another. - Conclusion
Nail foils are a fun and creative way to enhance your manicure, offering a shiny, reflective finish and endless design possibilities. Whether you want to add a little sparkle or create intricate designs, nail foils are an easy and trendy option to elevate your nails to the next level.