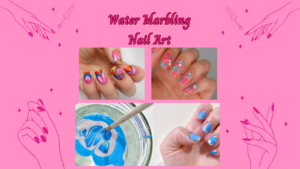
Water Marbling Nail Art: A Unique and Fascinating Technique
Water marbling nail art is a stunning and creative way to create beautiful and intricate designs on your nails. This technique involves using water and nail polish to spread different colors over the surface of water, creating a marble-like pattern. The design is then transferred onto the nails using either a stamper or dipping method. Water marbling allows you to create unique and eye-catching patterns that would be difficult to achieve with freehand painting.
What is Water Marbling Nail Art?
Water marbling involves dropping different colored nail polishes onto the surface of water to create a unique marble pattern. This pattern is then transferred onto the nails. The technique creates complex and beautiful designs that are difficult to replicate using other methods. It gives the nails a marble effect, which is why it is named “water marbling.”
Tools Required for Water Marbling
To begin water marbling, you’ll need the following essential tools:
Water: The water should be at room temperature, as the nail polish needs to spread smoothly over the surface.
Nail Polish: You’ll need various colors of nail polish. It’s best to use fast-drying polishes for water marbling to ensure that the colors spread evenly on the water surface.
Stick or Dotting Tool: These tools are used to spread the nail polish on the water and create different patterns.
Top Coat: To seal the water marble design and give it a glossy finish, a top coat is necessary.
Tape or Nail Guard: Use tape or a nail guard around your nails to prevent the polish from staining the skin.
How to Do Water Marbling Nail Art: A Step-by-Step Guide
Water marbling involves several steps, and it’s important to follow each one carefully to achieve the best results. Here’s how you can create beautiful water marbled nails:
Prepare Your Nails: Start by cleaning and shaping your nails. Apply a base coat to protect your nails. You can also tape around the edges of your nails to avoid getting polish on your skin.
Prepare the Water: Fill a small, clean container with room temperature water. Make sure the container is deep enough for your fingers to dip in.
Drop the Nail Polish: Take your selected nail polishes and drop them one by one onto the surface of the water. Drop the polishes in multiple layers so that they spread and create a marble effect. Each color should be dropped in quick succession to form concentric rings.
Create the Pattern: Use a stick or dotting tool to swirl the colors and create the marble pattern. You can experiment with different patterns, such as circles, lines, or any design that you like.
Dip Your Nails: Once the design is ready, dip your nails into the water carefully. Place your nail just above the water’s surface and submerge it gently to transfer the design onto your nail. Make sure to do this quickly, as the nail polish can dry quickly.
Apply a Top Coat: Once you’re happy with the design, apply a top coat to seal and protect the water marble. It will also give a shiny finish to your nails.
- Benefits of Water Marbling Nail Art
Unique Designs: One of the best things about water marbling is that each design is unique. Since the nail polish spreads differently each time, you will always get a one-of-a-kind marble pattern. - Color Blending: Water marbling allows you to blend different colors together to create stunning and vibrant designs that aren’t achievable with other nail art methods.
- Professional Results: Water marbling is an easy way to achieve professional-looking nail art at home. The results can resemble those of nail salon designs, making it an excellent option for DIY nail art enthusiasts.
Challenges of Water Marbling Nail Art
Difficult to Learn: Water marbling can be tricky to master, especially for beginners. It requires some practice to get the right technique and to create clean designs without mistakes.
Nail Polish Selection: Not all nail polishes work well for water marbling. Some polishes may not spread properly on the water, while others dry too quickly to create a smooth pattern. It’s important to use the right type of polish for the best results.
Messiness: Water marbling can get a little messy, especially around the water surface. You may end up with extra polish on your fingers or surrounding skin. Using tape or a nail guard around your nails can help prevent this.
Tips for Successful Water Marbling Nail Art
Temperature of Water: The temperature of the water is crucial. If the water is too hot or too cold, the nail polish won’t spread evenly. Room temperature water is ideal for this technique.
Work Quickly: Nail polish dries fast, so you need to act quickly after dropping the colors onto the water. Swirl the colors and dip your nails without wasting time.
Practice Makes Perfect: Water marbling takes practice. Don’t be discouraged if your first few attempts aren’t perfect. With time, you’ll get better at creating stunning designs.
Conclusion
Water marbling nail art is a creative and unique way to create beautiful and intricate designs on your nails. This technique allows you to blend different colors and create patterns that are difficult to achieve using other methods. While it may have a bit of a learning curve, once you master the technique, you can achieve stunning, professional-quality nail art at home. Whether you’re going for a vibrant mix of colors or a subtle, sophisticated marble look, water marbling offers endless possibilities for creativity. So, grab your nail polishes, try out this fun technique, and give your nails a beautiful marble makeover!